Valle Aviles: Best Through Hike in Patagonia to Avoid the Crowds

I had wanted to hike Valle Aviles for many years and I finally got the chance to in November 2023. Beautiful and remote, it was an amazing 2 nights in the backcountry (can be extended).
Don’t let mostly flat profile on AllTrails fool you into thinking it’s not too challenging of a route, like I was. The abundance of water crossings and time spent hiking in the river bed makes it into a difficult hike, but it is so worth it!
Want to do this as a guided hike?
I am a travel advisor with Fora and would love to help you plan your trip! Send me a message here today!
A big reason I wanted to go to this area is because of how frequently pumas are sighted, both at the start and ending point. Unfortunately, I never got to see any 🙁
The TLDR Version
This post in about 50 words:
Valle Aviles is a remote 30-mile through-hike from Jeneimeni to Parque Patagonia. It is mostly flat, but still challenging due to the abundance of stream crossings and time spent walking in stream beds. You can do the hike in 3-4 days and you can also extend it by going to Tamango next.

What direction should I hike?
I recommend hiking from north to south, so the trail overall will be a descent, following the river. This way, you could also choose to extend you trip into Tamango reserve for an additional few nights. It also makes arranging your transportation easier.
How long does the hike take?
We did the hike in 3 days, 2 nights. We stayed in Chile Chico the night before our trip and then paid for someone to take us to the trailhead. There is an additional campground within the park, making 3 nights a good option.
You can also extend a few days by continuing into Tamango Reserve afterwards. You would need to hitchhike or arrange prior transportation to get to Tamango (or to Cochrane for that matter).
There is a campground at both the start and end point of the hike.

How to get to the trailhead?
I recommend flying into Balmaceda airport and staying a night in Coyhaique to get all of your supplies gathered. Then, you can take a bus and a ferry to Chile Chico. The ferry schedule changes throughout the week, so make sure you plan accordingly. You can buy your ferry and bus tickets in person at the Coyhaique bus terminal.
We stayed in Chile Chico the night before beginning the trek. Unfortunately, there are no buses that run to the park. I found a tour and transportation company, Garnik Bike, to take us to the CONAF ranger station, where the hike begins.
You could try to hitchhike. We went in mid November, which is a bit before the tourism season really kicks off so I was afraid we’d be stuck walking 55km if we tried to do this.
You could also rent a car, but then of course you’d have to circle back for it and probably have another car to get yourself there again.
Where to Stay in Chile Chico
I recommend this hotel for your night in Chile Chico: Casona Belga Hotel Boutique & Restaurant
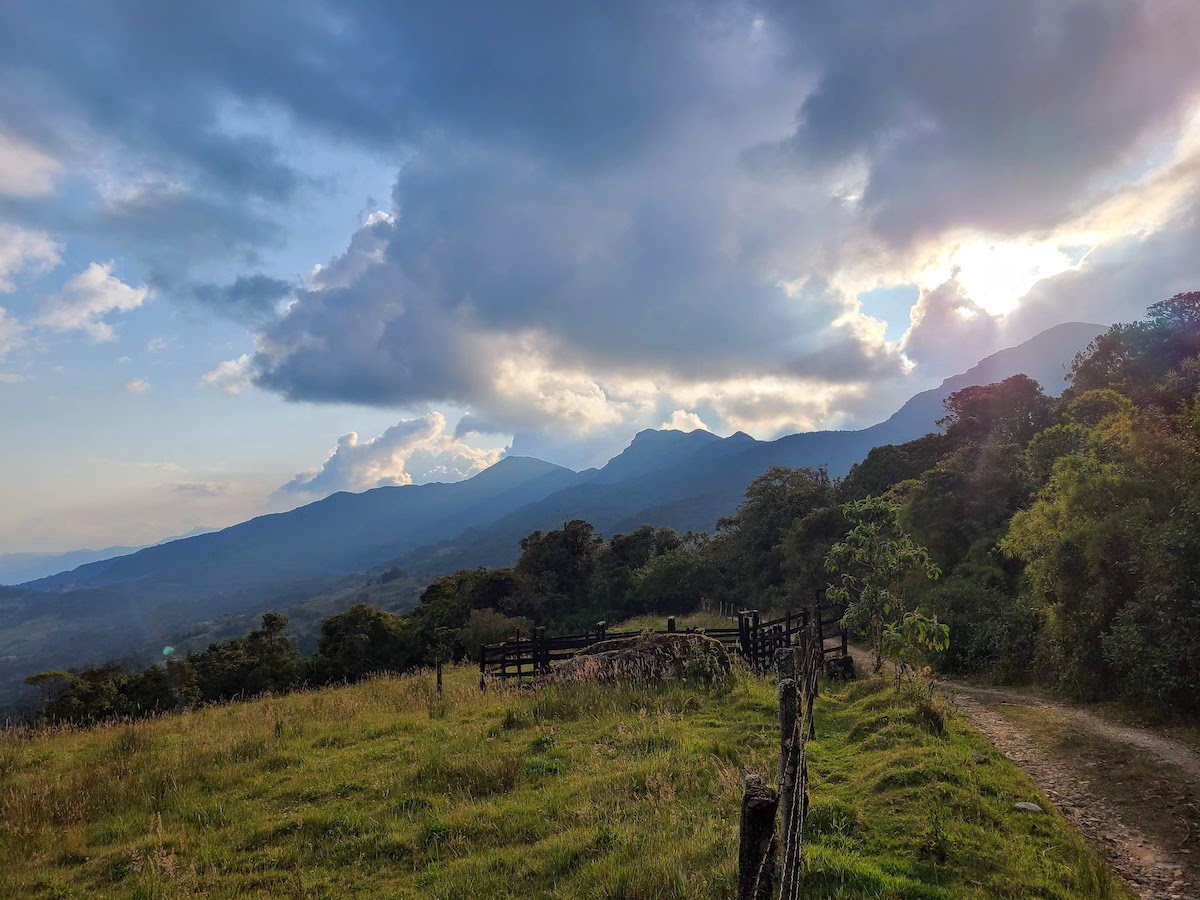
The Hike!
Finally, let’s get to the good part. What should you expect on this hike?
In short, lots of water crossings. I thought the water crossings were going to be done after the first day, but they weren’t. They continued well into the second day (which would be day 3 in the below itinerary as I combined days 1 & 2 when I went).

Day 1 – CONAF to Camping Raleigh
After checking in at the CONAF station, the hike starts on a 2 track road around the edge of the lake. Once you reach the end of the road, you have another 3.9km to Camping Raleigh. AllTrails measures it at 5.5 miles from the trailhead.

You will have a deep water crossing before getting to Raleigh. We arrived here pretty early in the day, so we opted to continue on to Valle Hermoso which is an additional 4.8km (8.7km total, although AllTrails says 9.7 miles and I believe it).
Day 2 – Camping Raleigh to Valle Hermoso

This is the day with the epic views. After many stream crossings (I tried and failed to keep count), the trail will cut off into the woods. You’ll go pretty much straight up and over La Gloria Pass. The way down is a bit treacherous, so definitely be cautious. There is a big scree section.

Once you get down from the pass, surprise! You’ll have more stream crossings to get to Valle Hermoso shelter. When we were there, the last 100m of the trail were flooded. We tried to scamper our way along the edges before I finally gave up and tromped through the middle of it. I was over it by that point.

There are picnic tables that looked like they’ll eventually be covered, a latrine, and an old building from the gaucho days. AllTrails has it clocked at 9.7 miles from the trailhead, only 4 from Raleigh but they’re a tough 4 miles.

Day 3 – Valle Hermoso to Valle Aviles

The next morning, you can keep your water shoes on (more thoughts on this at the end) because your first hours will be more stream crossings until you get into a nice little trail in the woods. Sometimes it was very clear and sometimes it was pretty overgrown.

As you go around the mountain, make sure you turn around to see the epic views behind you. We also got a little lost here. It’s always good to have the gpx downloaded so you can navigate offline.

There’s a lake at the end of this section and I saw Yellow-billed Teals and a Thorn-tailed Rayadito. This is also where the countdown begins! There are kilometer markers from here forward. There were also more stream crossings after emerging from the woods.

There aren’t really clear designations on where to stay this night. We stayed here at an unofficial site, but there are other options before or after. If you zoom in on AllTrails, you can see them marked. This is 19.5 miles from the trailhead, 10 miles from Valle Hermoso.

Day 4 – Valle Aviles to the Road

This was our first sunny day and you can see the drastic change in vegetation today. The forest is mostly left behind in favor of scrub. I don’t think we had any water crossings today other than a few wet spots that we were able to jump over or navigate around.

The trail is a bit more up and down than I expected, so here’s your warning. This is also the day where you get to see the awesome hanging bridge. Note, the trail splits here as it is a loop day hike from the road. Because of that, we passed several groups of people today. We opted to stay straight (not cross the bridge) because it looked slightly more direct and less hilly, but definitely still check out the bridge.

After you finish going up and over the rocky treed areas, it is a quick easy walk along the plains. As you get to the end, don’t fret. There is a bridge to cross the large river. At first, you don’t see it but it is there. I was slightly panicked if you can’t tell.

At the end of the trail there is a campground and building, but no one was in it. I saw a bunch of Austral Parakeets here!!
From here, you need to hitchhike to Cochrane or to Tamango to continue your hike (a little before Cochrane). Adventure Alan has a good post on this and even a gpx file you can download.
No one in the parking lot was able to take us so we sat along the road for probably at least an hour when a lone German man stopped and picked us up. Thank you! We were pretty much out of food so we were very happy to not have to camp another night.
Cochrane
We stayed in Cochrane a couple days to recover. My feet hurt so bad from walking so many miles in crocs. I thought I had done permanent damage. They hurt for nearly a week, but fortunately recovered and have been normal since.

Because of this, we didn’t really get up to much in Cochrane, however you can take a day trip into Reserva Tamango which is really beautiful and a good place to see huemul deer. I went years ago and camped in the park for a few days. I did not see any huemul, but another couple did when I was there. Very upsetting.
Where to Stay in Cochrane
Final Thoughts

If any of you are experienced water hikers, you probably already know this, but for trails like this please don’t do what I did and walk in crocs for hours. It is best to hike in trail runners or a NON waterproof shoe (so it has a chance of drying) and just hike right through the water and keep going. I know it doesn’t sound comfortable, but if you have a good wool sock on (I like smartwool and darn tough) it’s really not that bad.
You can bring extra socks and change more frequently when you’ll have longer breaks without streams crossing like when you go over the pass or through the woods.

Overall, I definitely recommend this hike. It is challenging, but still approachable with better footwear choices. I think it was some of the most impressive landscapes I’ve seen in Patagonia and I have been all over.
Funny Story
Now for a funny story. We actually weren’t alone on this trek. There was another American couple who ended up camping at the same places we did. They spent a night in the park the night we were in Chile Chico, but they got a slow start and we passed them early on on the first day.
We assumed they must’ve stopped at Raleigh campground because when we were sitting at a highpoint in the trail, we didn’t see them in the valley. We were a bit concerned about this couple because he was in jeans and a cowboy hat, not your typical choice of clothing. Everyone has heard the saying cotton kills, right?

Cotton doesn’t dry quickly like wool, bamboo or some synthetic fibers so it’s not usually a good clothing choice when you’re in the backcountry, especially somewhere you could get hypothermia.
Anyways, they showed up just before dusk. We talked a bit with them and more the next night. We learned that she had never been backpacking before and they had only been dating for like 6 months!! They came for her 30th birthday–really she wanted to go to Argentina to a ranch spa or something, which is where they were headed after.
Here’s some unsolicited relationship advice. Do not take your partner, especially a new partner, to another country to try a brand new activity in the middle of the remote wilderness.

Also, it was unseasonably cold this trip. I was wearing wool longsleeves, a midlayer, and a down jacket, usualy with gloves and a hat the first 2 days of this trip. It wasn’t until the last day that it got warmer and we finally stripped down to one layer.
This guy told her not pack her warm clothes! She had a good jacket, but not so much on the mid layers. I’m not sure what their camping gear was like…
Once we got to Cochrane we ran into them at a restaurant. The next day we had lunch with them and they were fighting so much. Not only this, but then they had an evening flight in Argentina this same day. They were going to take a bus back to Chile Chico, then drive back to Argentina, return the car and catch their flight.
I wonder if they made it. Both the flight and their relationship.
The Birds
This was my first time back in Patagonia as a birder. On the way into the park, we passed a lagoon which I wish we could’ve stopped at longer. There were so many species here, but I only got a quick glimpse from far away. Definitely stop here if you can.

Andean Condor
Austral Parakeet
Austral Thrush
Black-chinned Siskin
Black-faced Ibis
Black-necked Swan
Chilean Flamingo
Chilean Swallow
Chiloe Wigeon
Dark-faced Ground-Tyrant
Gray-hooded Sierra Finch
Long-tailed Meadowlark
Magellanic Woodpecker
Rufous-collared Sparrow
Thorn-tailed Rayadito
Upland Goose
White-bellied Seedsnipe
White-crested Elaenia
Yellow-billed Teal

I was very excited about the Seedsnipe, which took me a long time to identify after my trip, and the Austral Parakeets. So cute.
Looking for more in Patagonia after or before Valle Aviles? Combine this trip with Cerro Castillo or a longer trip crossing from Chile into Argentina.